More drops and rarer ones first by a long way: Looter, Raider and Luck on every piece that can take them. Damage barely counts, so farm easy levels and chests with it rather than bosses.
All gear at power 263 with the best rolls and enchantments · no particular boss · updated 20 October 2026
Looter IIIGrants a 60% chance to get additional loot drops.
Raider III · Soul StormGrants a 3% chance of higher rarity loot drops.
Raider Built-inGrants a 5% chance of higher rarity loot drops.
Lightning Surge IIIWave deals 90% of weapon damage and zaps mobs for a short time, making them weaker but faster.
Ranged
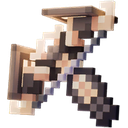
Shooting Star
UniqueSoul Storm
Looter IIIGrants a 60% chance to get additional loot drops.
Raider III · Soul StormGrants a 3% chance of higher rarity loot drops.
Evasion Built-inGrants a 20% chance to evade melee damage.
Tempo Theft IIIGrants a 50% chance to increase movement speed when defeating enemies.
Helmet
Monarch Crown
UniqueSoul Storm
Luck IIIGrants a 20% chance to drop duplicate variations of items.
Acrobat III · Soul StormReduces rolling cooldown time by 25%.
Looter Built-inGrants a 80% chance to get additional loot drops.
Health Synergy IIIArtifact usage heals 35% of your maximum health.
Chestplate
Disciple Robe
SpecialSoul Storm
Luck IIIGrants a 20% chance to drop duplicate variations of items.
Prospector IIIGrants a 15% chance to receive additional emeralds.
Acrobat III · Soul StormReduces rolling cooldown time by 25%.
Health Synergy IIIArtifact usage heals 35% of your maximum health.
Leggings
Sage Belt
UniqueSoul Storm
Luck IIIGrants a 20% chance to drop duplicate variations of items.
Prospector III · Soul StormGrants a 15% chance to receive additional emeralds.
Acrobat Built-inReduces rolling cooldown time by 40%.
Barrier Brew IIIPotion usage creates a Fortifying well for allies lasting 6 seconds.
Boots
Oracle Sandals
UniqueSoul Storm
Luck IIIGrants a 20% chance to drop duplicate variations of items.
Prospector III · Soul StormGrants a 15% chance to receive additional emeralds.
Raider Built-inGrants a 5% chance of higher rarity loot drops.
Springload IIIArtifact usage grants the Hurrying status for 6 seconds, increasing movement speed.
Artifact I
Turtle Master's Mandolin
RareSoul Storm
Electromancer IIILightning attacks deal 20% more damage.
Any roll Soul StormNothing this item can roll here helps this build.
Artifact II
Totem of Shielding
RareSoul Storm
Healer IIIIncreases healing given to yourself and allies by 50%.
Ally III · Soul StormPositive statuses you apply to yourself and allies last 50% longer.
Artifact III
Witch Brew
Common
Talisman I
Emerald of Good Fortune
Level 3
Prospector Level 3Grants a 25% chance to receive additional emeralds.
Talisman II
Lucky Clover
Level 3
Looter Level 3Grants a 7% chance to get additional loot drops.
Talisman III
Armadillo Amulet
Level 3
Acrobat Level 3Reduces rolling cooldown time by 45%.
How it rates
Each meter is out of 100, where 100 is the best any build in the game reaches on it. The priorities are what the optimizer was asked to favour for this playstyle.
Damagepriority 80
Damage reductionpriority 841
Healingpriority 888
Mob clearingpriority 80
Boss damagepriority 80
Speedpriority 840
Best build for each fight style
The best build that swings its melee weapon most of the fight (melee), or shoots its bow most of the fight (ranged), or deals most of its damage with Tumbleshot arrows as it rolls (rolling), or deals most of its damage as Soul damage (soul). Score is its score for this playstyle as a share of the best build above. In the optimizer, the Fight style filter on the Priorities tab finds these for any mix of priorities.
Bosses take more damage from some damage types and less from others, so the best weapons and artifacts change from boss to boss. Damage taken is how hard the build's damage mix hits that boss: above ×1.00 it plays to the boss's weaknesses. Under each build, the best melee, ranged and rolling build against that boss, scored against it.
These builds assume you own every item. Add your own items in the optimizer and it finds the best build from what you actually have, for whatever mix of priorities you like.

 Looter IIIGrants a 60% chance to get additional loot drops.
 Raider III · Soul StormGrants a 3% chance of higher rarity loot drops.
 Lightning Surge IIIWave deals 90% of weapon damage and zaps mobs for a short time, making them weaker but faster.

 Evasion
 Tempo Theft

 Luck
 Acrobat
 Health Synergy
 Prospector

 Barrier Brew

 Springload

 Electromancer

 Healer
 Ally